Stringing assigns the panels already on the roof to PV strings and those strings to an inverter’s MPPT inputs. It is how the design stops being a picture of a roof and starts being an electrical proposal. It happens inside the Roof Design editor, using the String Editor. ArcSolar receives and stores what the editor produces; ArcSolar does not calculate stringing itself.

Wire panels into strings

  1. Place the panels first. Stringing works on panels that are already on the roof.
  2. Choose String Editor from the canvas tools, or press T.
  3. Pick the inverter. Use the dropdown, not a typed name — a typed name is only kept if it explicitly matches a known model.
  4. Pick the string and the MPPT input it should use.
  5. Drag across the panels in wiring order — first module to last.
  6. Alt-click a panel to disconnect it from the string.
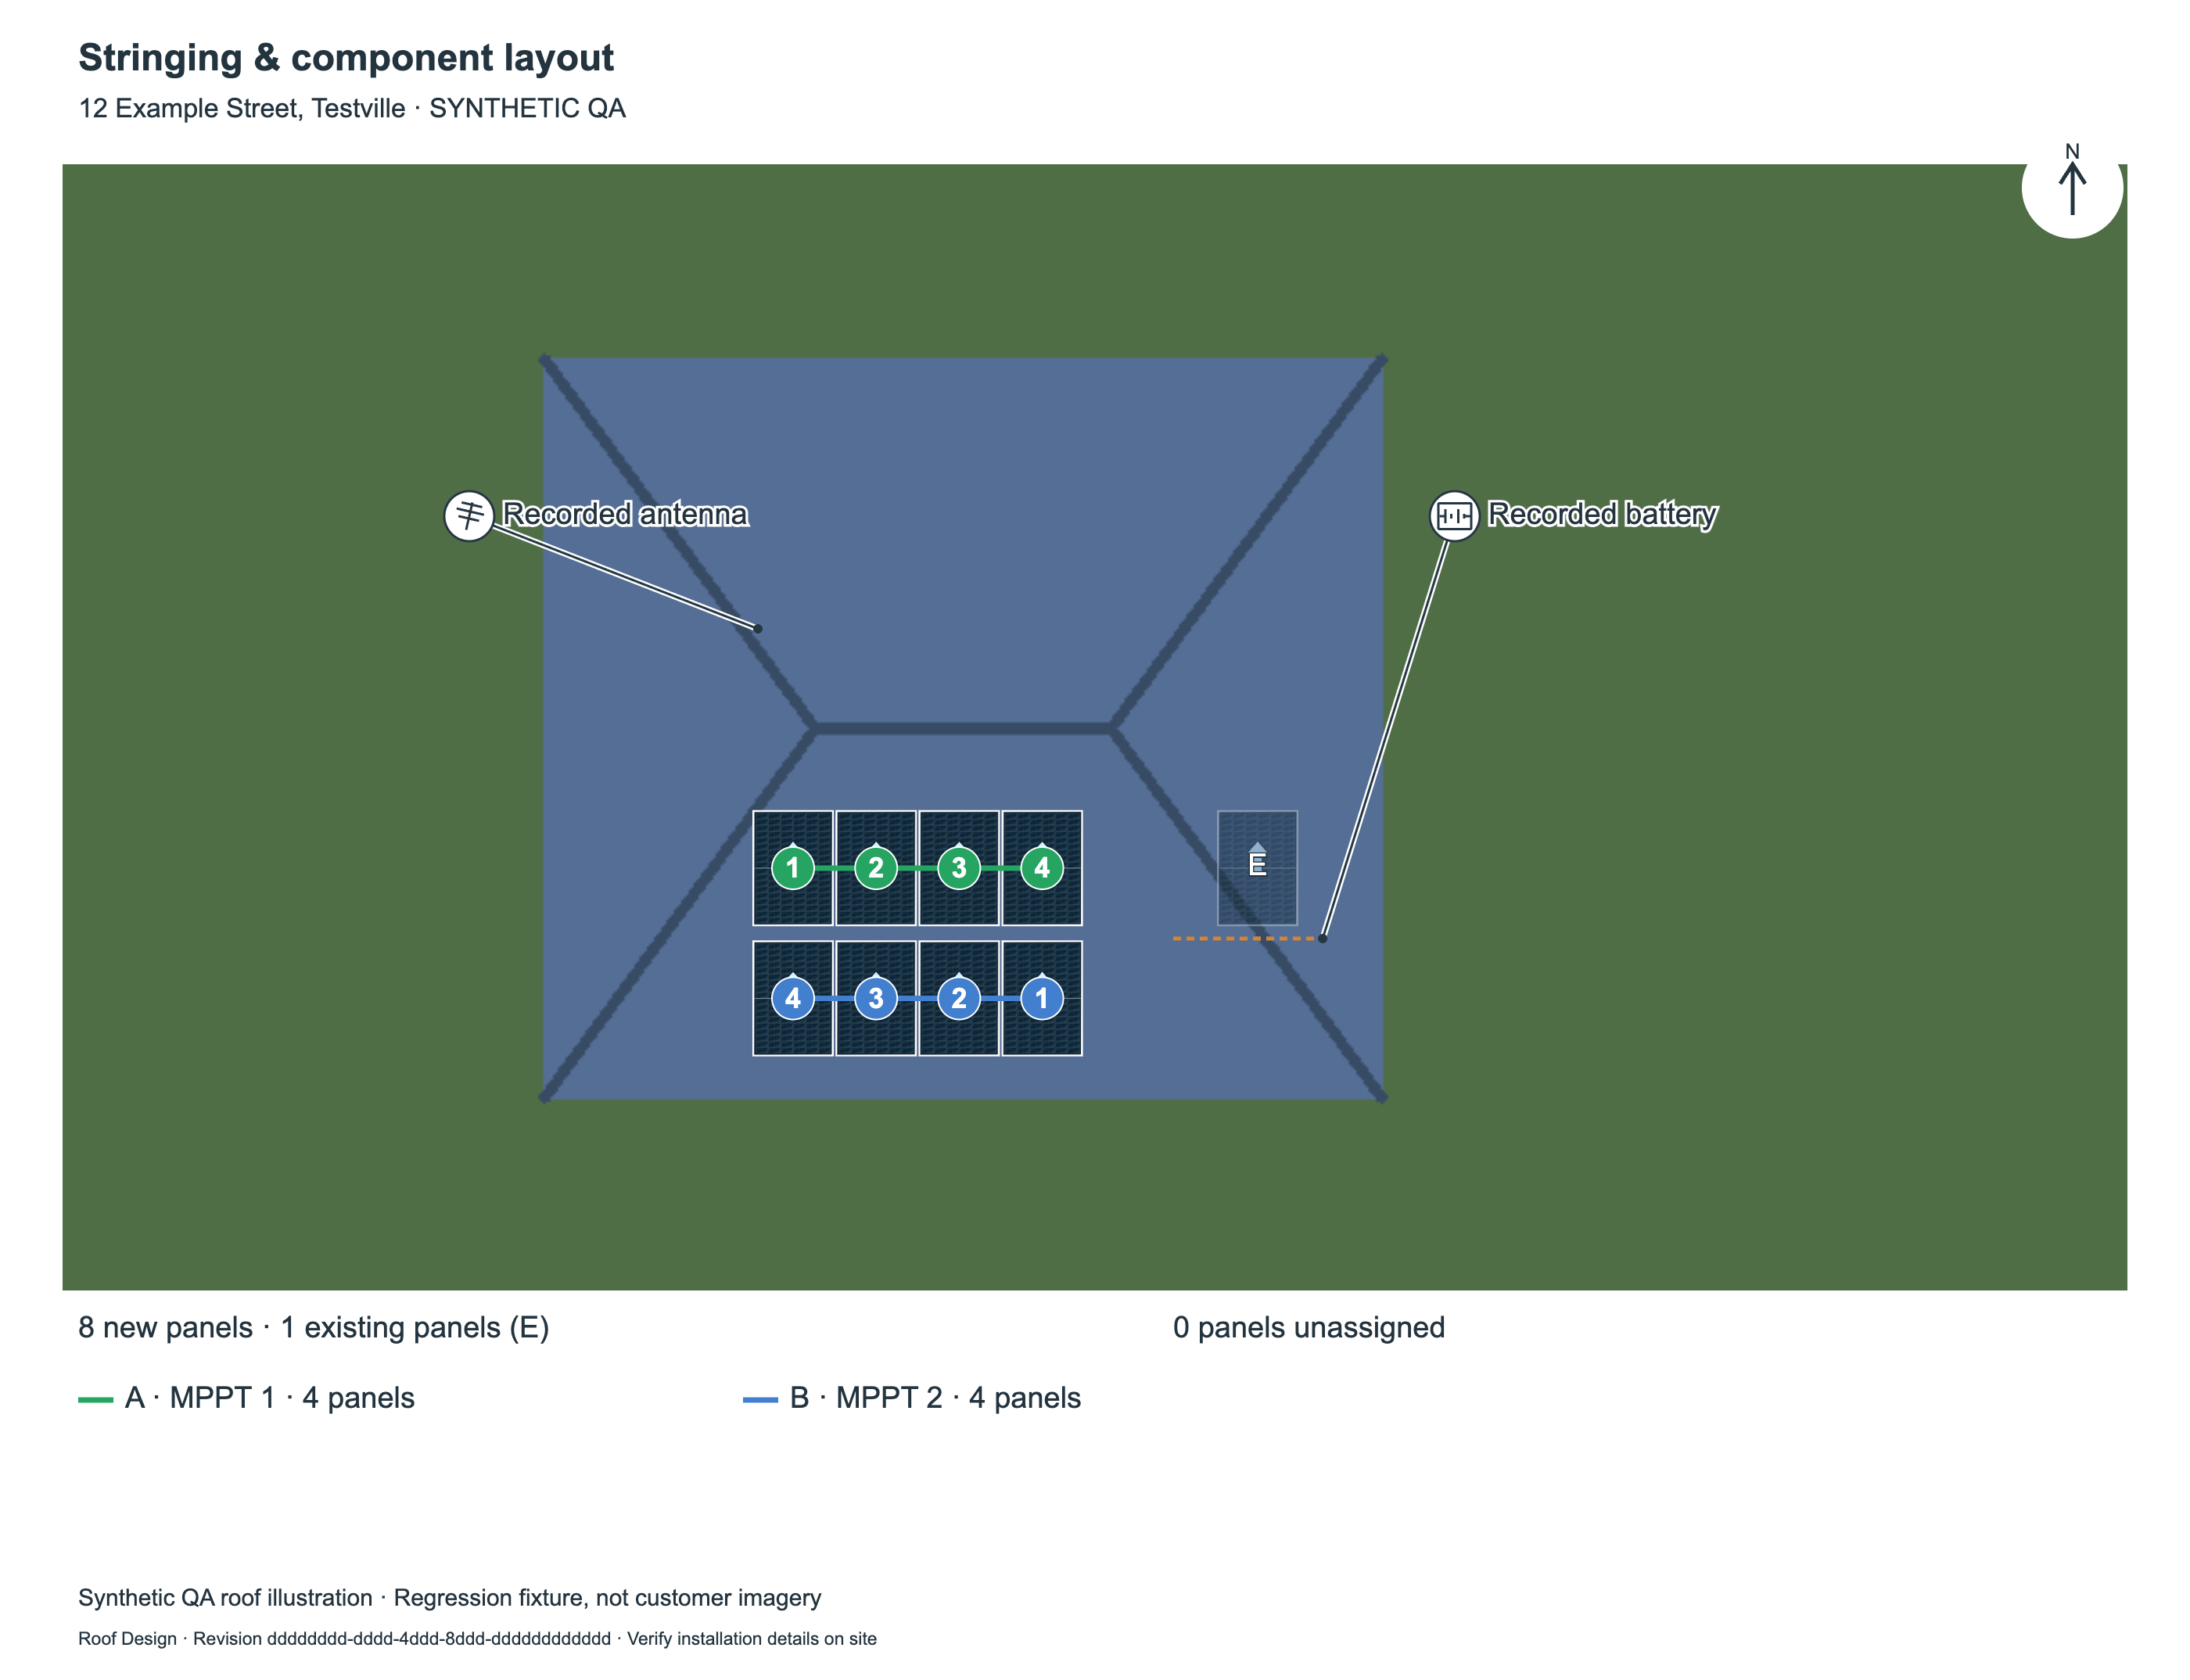
The header tells you whether real manufacturer limits or demonstration limits are in use: Manufacturer specifications · preliminary design checks, Demo inverter limits · preliminary design checks, or Manufacturer specifications and demo models · preliminary design checks.A count bar tracks the string as you build it and warns when a string runs past the allowed series-length window. The stringing layout report — labelled Stringing & component layout on the quote — shows the result.
Stringing and component layout drawing for 12 Example Street, Testville · SYNTHETIC QA, showing two strings of four numbered modules each with the legends A · MPPT 1 · 4 panels and B · MPPT 2 · 4 panels, the count 0 panels unassigned, a recorded battery and antenna, the attribution Synthetic QA roof illustration · Regression fixture, not customer imagery, and the footer Roof Design · Revision … · Verify installation details on site.

The **Stringing & component layout** render from the editor — the image ArcSolar labels on the quote. Each string is drawn through its own modules in wiring order, numbered from the first module to the last, and the legend under the drawing names the string, its MPPT and its module count. The electrical semantics live in the editor's payload, not in the image.
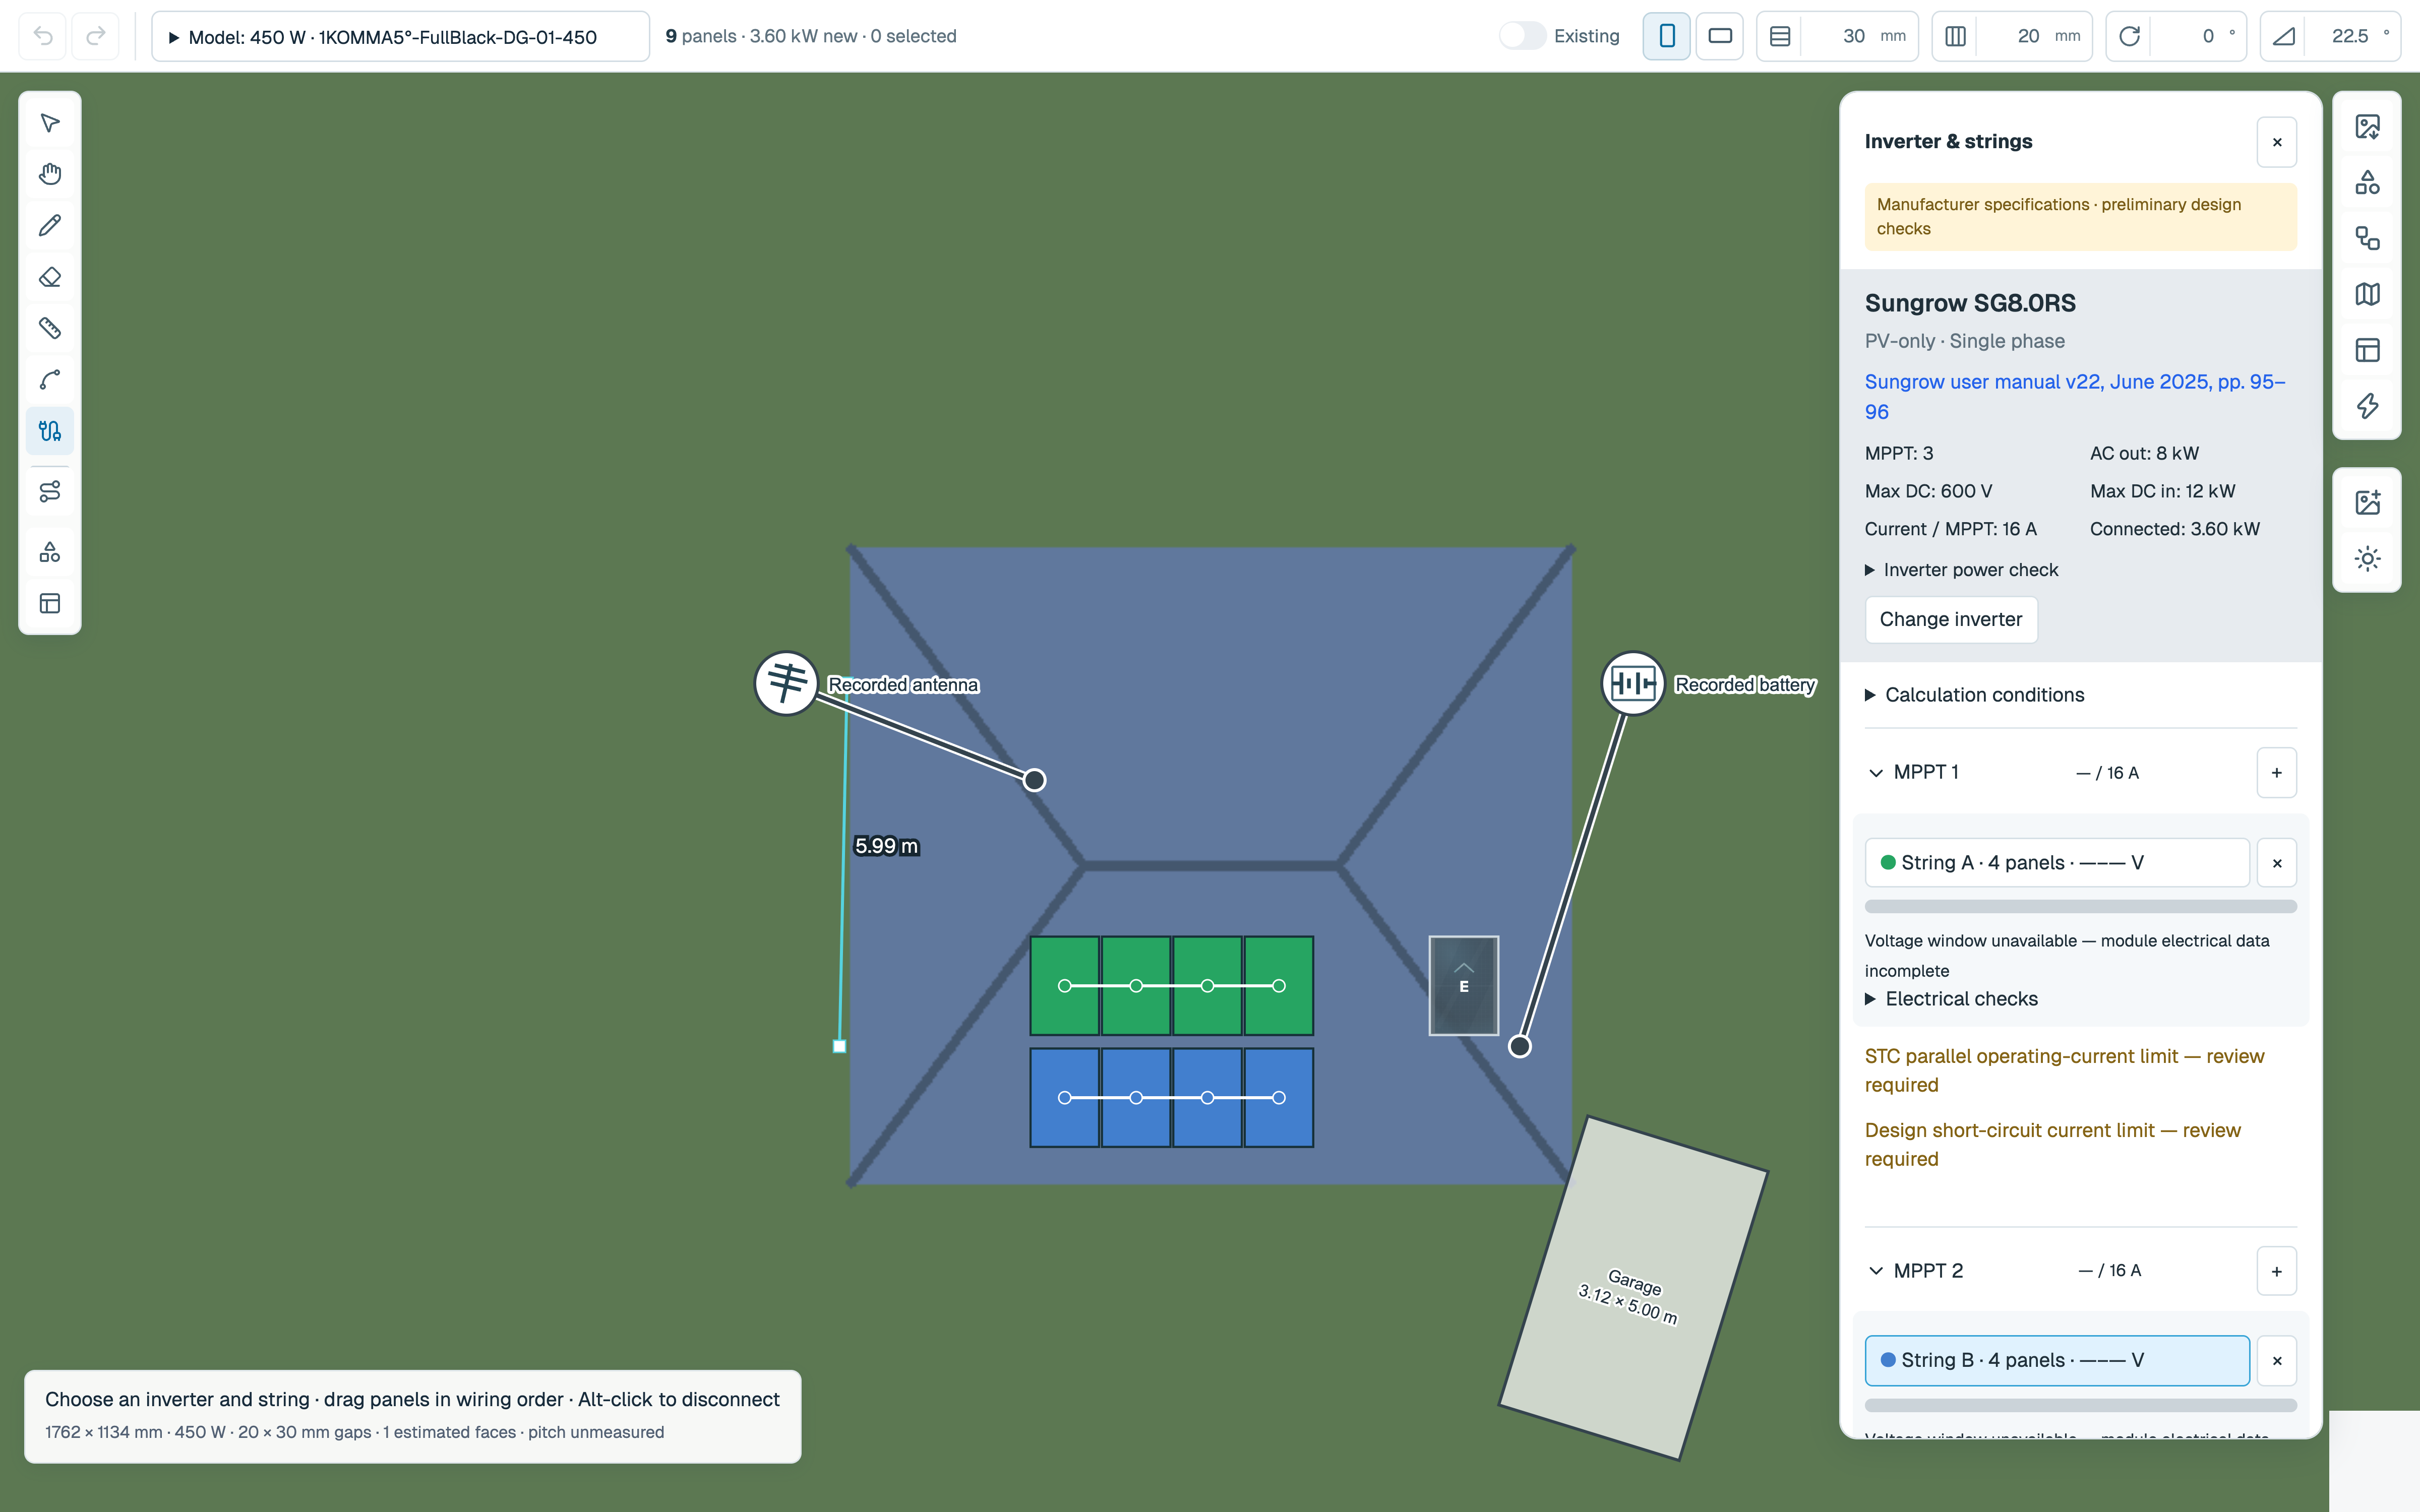
The editor checks that string voltages fit the selected inverter. It does not check current, protection, connectors, shading or whether the installation is compliant. Mixed panel models, or incomplete temperature data, mean it gives no recommendation at all. Always confirm the limits and temperature coefficients against the manufacturer’s datasheet.
Roof Design canvas with the String Editor open, showing strings drawn across demonstration panels, the inverter and strings panel at the right, and the stringing help text under the canvas.

Standalone design build with a synthetic roof image and demonstration panels; in the deployed editor the roof image is Google satellite imagery. The String Editor draws each string across the modules in wiring order, and the panel at the right holds the inverter, the strings and the MPPT inputs.
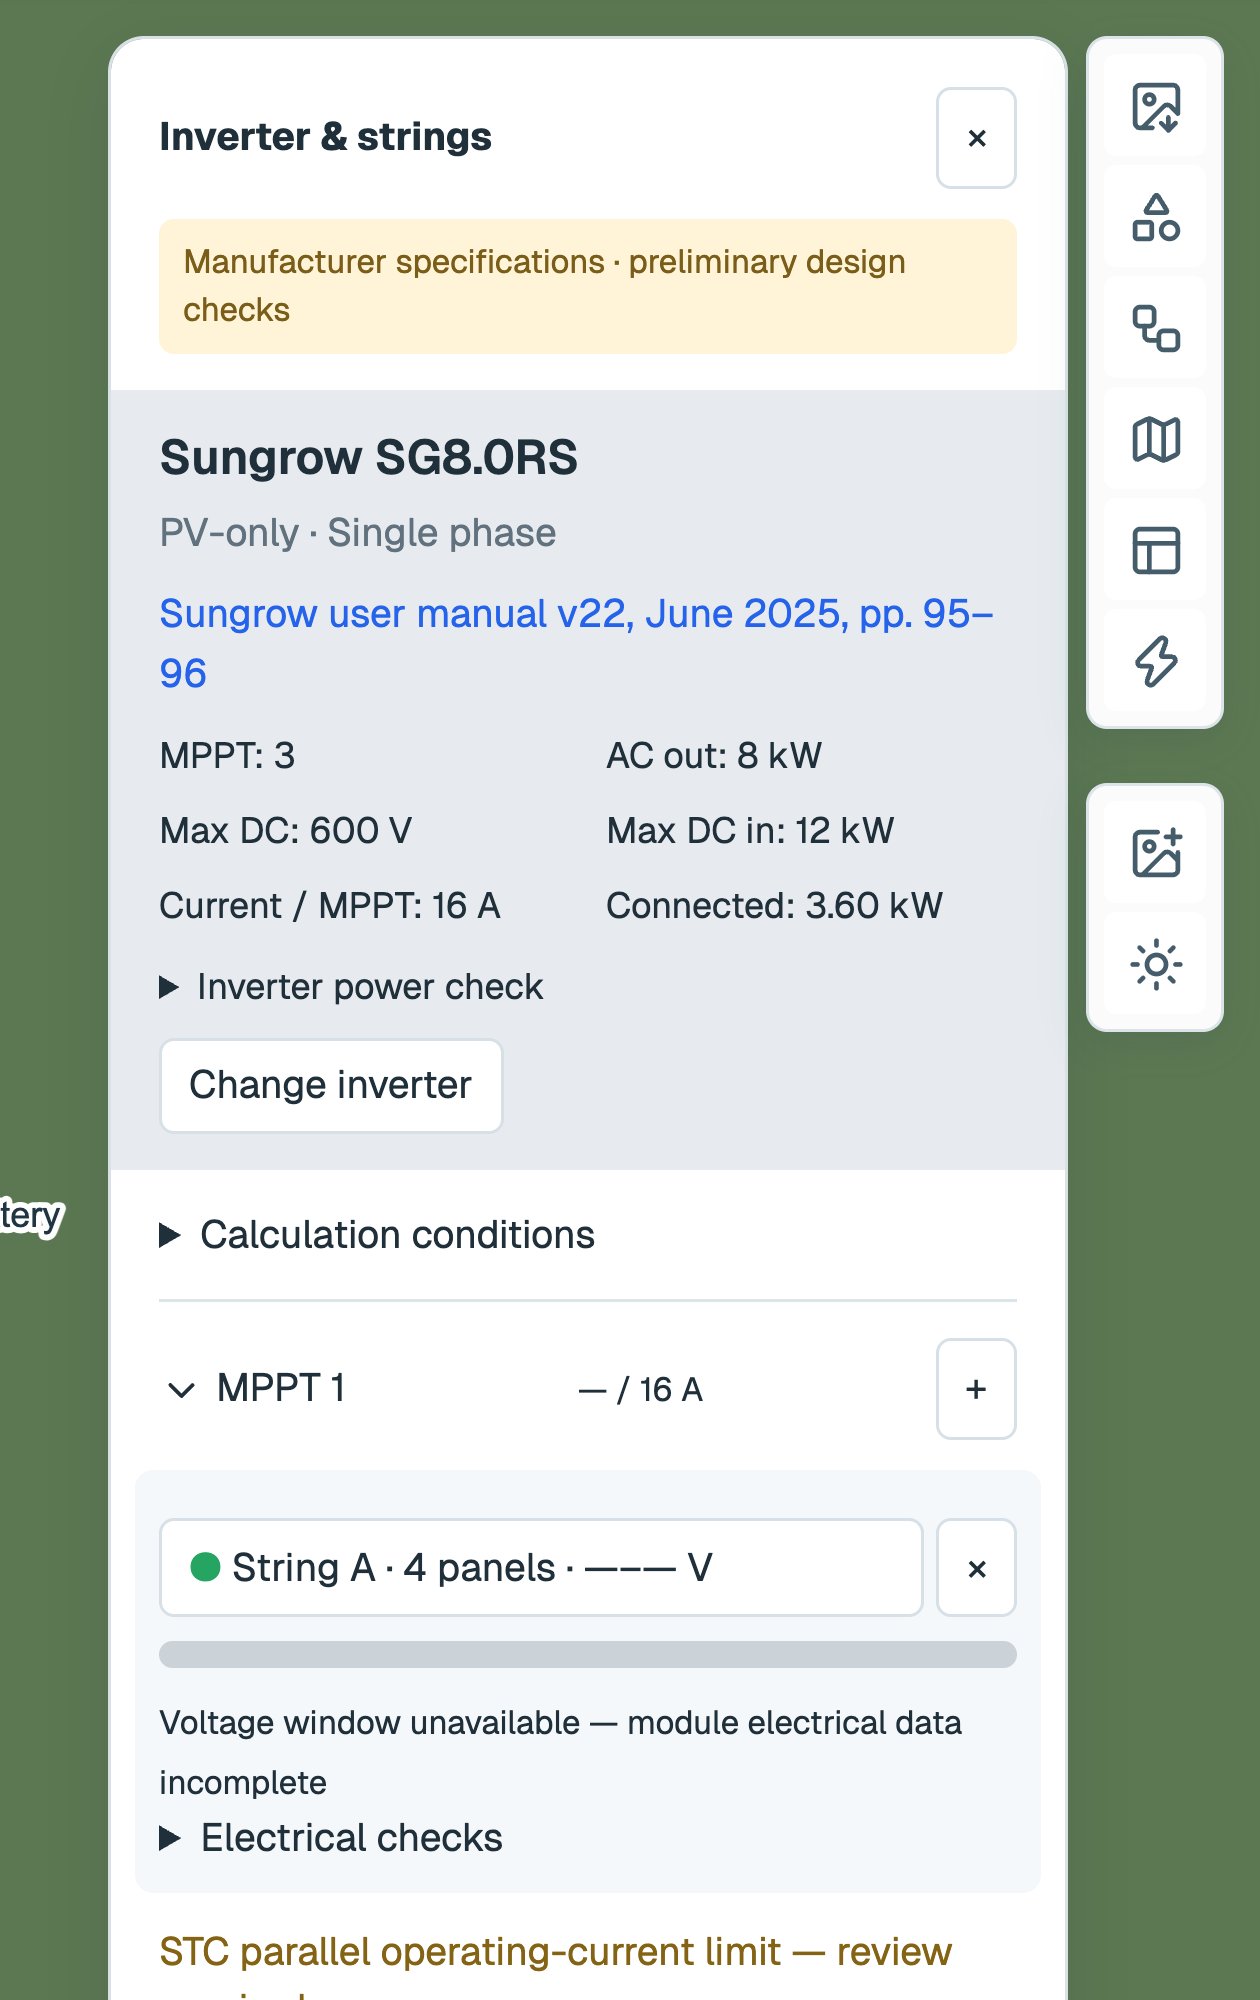
Inverter & strings panel for the Sungrow SG8.0RS under a Manufacturer specifications · preliminary design checks header, showing 3 MPPTs, 8 kW AC out, 600 V maximum DC input, 16 A per MPPT and 3.60 kW connected, then the MPPT 1 group with String A · 4 panels, and the note Voltage window unavailable — module electrical data incomplete.

String properties and MPPT assignment. The header states which class of inverter data is in play — here Manufacturer specifications · preliminary design checks — over the selected inverter's limits, its power check and the MPPT groups with the strings assigned to them.

ArgonixIntelligence in this workflow

Intelligence can help read the stringing layout and explain why a string sits outside the voltage window. It cannot verify the equipment, the temperature assumptions or the installation, and it cannot approve the design. Confirm stringing against manufacturer data before it is built.